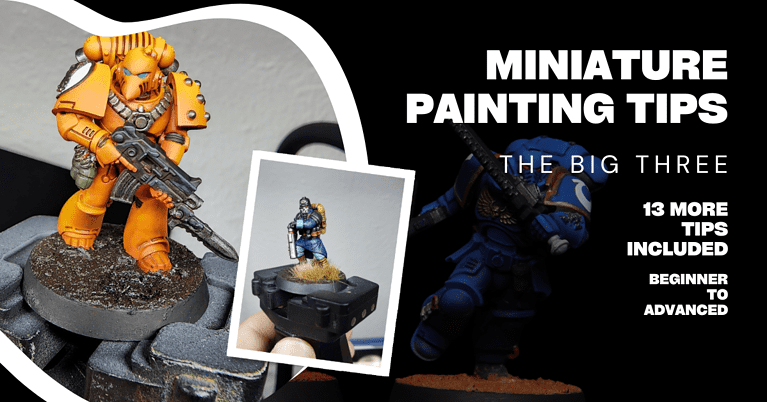
Painting Warhammer: The 5 Most Popular Methods (Plus 4 Styles To Try)
Painting Miniatures is an art form. Traditional art styles have variations like minimalist, abstract, surreal, modern and pop. In the same way, painting Warhammer models is a matter of style and taste.
In miniature painting, you can choose to paint your models in a classic style, or grimdark, or comic, or a wide variety of other styles and methods that I will lay out here.
Five of the Most Popular Methods of Painting Warhammer Models and Other Miniatures
The Five Methods of Painting Warhammer Miniatures I will cover are: Games Workshop Classic Method, Games Workshop Contrast Method, The Slapchop Method, Technique Based Methods. and Speed Painting Methods.
When I say “method” here I’m talking about a painting process to get you from the start to a finished painted miniature. For example a basic level method of painting a Warhammer miniature would be: Prime, Base Coat, Wash/Shade, Highlight
The method is just the series of steps you take to get there. These are popular because there is a reason the steps are taken in that order, and a reason we use certain tools and paints. They also serve as a roadmap for people learning the miniature painting hobby.
Games Workshop Classic Method of Painting Warhammer Models:
The Games Workshop Classic Method of Painting has two levels: Battle Ready, which is a basic finish, and Parade Ready, which is a more involved finished paint job.
It is designed for you to be able to finish your Warhammer models as Battle Ready (basic) and just stop there, or continue on to the next stage of Parade Ready (intermediate) if you want to invest more time.
Classic Battle Ready Method:
- Prime your miniature
- Base Coat the miniature
- Apply a Wash or Shade to the miniature
A simple, and effective way of getting a basic finish on your models. This method works for a few reasons. It’s not complicated and easily accessible. There is a lot of nuance to painting, and this takes a lot of the guess work out of it.
Priming allows the paint to stick to the model very well and is an important foundation.
Base coating with thin coats will give you a smooth clean finish.
Applying a simple wash to the recesses of the model will give the illusion of shadow. It’s a very simple way of adding contrast. Without contrast the model will look very flat. A wash is the easiest way to level up the look.
Classic Parade Ready Method:
- Start with a Battle Ready Miniature outlined above
- Edge Highlight one thin layer of paint that is a shade lighter than your base coat.
- A second, thinner Edge Highlight of a lighter shade of paint than the first edge highlight.
Example: If you base coat your Ultramarine Space Marine in McCragge Blue, you would apply an edge highlight in Calgar Blue, and then a thinner layer of Fenrisian Grey on top of that.
Dont worry too much about the exact colors, just think base color, a mid tone and a highlight. Base is darkest, then a shade lighter, and finally a light shade of your base color.
Edge Highlighting is fairly challenging, but it makes a big impact on the final result. GW makes their products with the painting in mind. Space Marines have a lot of sharp clean edges for you to highlight, and that’s purposeful.
Games workshop also gives you the colors they suggest on their site. If you look up the model, for example this Primaris Lieutenant, and scroll down to the bottom. You can click on the colors and GW gives you the paints they used for Battle and Parade Ready.
If you want to use other brands, I suggest this conversion chart to find Vallejo or other paint equivalents to Citadel.
Games Workshop is the company that makes Warhammer 40k, Age of Sigmar and the rest of the Warhammer IPs. So it stands to reason they would come up with a good way for their customers to paint the models.
The GW Classic Method is the way I started my painting journey and it’s what you will see on most of the “Get started Painting” video tutorials.
TIP: While this is an excellent starter, I would encourage you to try other methods of painting in your journey.
Games Workshop Contrast Method of Painting Warhammer Models
The Contrast Method also has Battle Ready and Parade Ready standards. The only difference being using a Contrast Paint as opposed to a standard acrylic base or layer paint.
Contrast Paint adds an intrinsic light/dark contrast. GW has removed the Wash stage in the Contrast painting method since it achieves the same basic effect in one layer.
Contrast Battle Ready Method:
- Prime the miniature (this is extra important for Contrast Method)
- Apply a fairly generous amount of Contrast Paint
So just two steps. Pretty simple. The entire purpose of Contrast was to get models on the table quickly, while giving them a good look.
Primer is critical to success here. Contrast Paints are designed to be translucent. They are very thin paint out of the pot. You will see the layer below it when you apply them.
GW suggests Grey Seer for a prime when you’re using their Ultramarines Blue Contrast Paint. If you use a standard black primer instead, the finish will look dramatically different.
Contrast Parade Ready Method:
- Start with a Battle Ready Contrast Miniature outlined above
- Edge Highlight one thin layer of paint that is a shade lighter than your base coat.
- A second, thinner Edge Highlight of a lighter shade of paint than the first edge highlight.
The Parade Ready step is the same as the traditional method. You’re just edge highlighting in two layers.
Let me say right off the bat, I’m not a fan of the Contrast Method. I love Contrast Paints, but if you are just doing a prime and one coat of Contrast, they tend to look very washed out. It’s also not much quicker than the traditional method.
You can absolutely get a very high level finish with Contrast paints, but it requires multiple layers and a bit of practice. Check out Juan Hidalgo’s Contrast Marines for a great set of examples of high level Contrast work.
As for tutorials and where to go for videos on these methods, try here first: Citadel Colour Videos
SlapChop Method of Painting Warhammer 40k and other Miniatures.
I went into detail on the SlapChop Method here but it’s well worth covering again. This method is extremely popular right now. It takes advantage of a lot of very efficient techniques that don’t require extreme skill levels to pull off.
SlapChop is quick, efficient, effective and fun. None of the steps are tedious, and it gives a very good result.
The SlapChop Method is as follows:
- Prime Model in Black
- Heavy Dry brush in light grey
- Light dry brush in white or off white
- Apply any contrast type of paint. Citadel Contrast Paint – Vallejo XPress Color – Army Painter Speed Paint
All 4 steps are very simple to do. Priming can be done with a spray can, airbrush or paint brush. Dry brushing is a simple technique using a broad, dry brush with very little paint on it. And contrast/speed/xpress paints are simply one coat with a paint brush.
By starting with a black primer base, you have the foundations of the deepest shadows. Then you’re applying light grey to where light would naturally fall: the highest points of your miniature.
Next a white/off white dry brush to show the very brightest highlights.
Finally, the Contrast paint will naturally flow into the recesses (lowest creases and crevices of the model). The result is a wonderfully simple model with color and contrast.
All of these steps are achieving the goal of light and dark contrast, which is one of the more challenging parts of painting warhammer models.
Improving on SlapChop Method Painting
If you are looking to take things a step further, you can look to any methods and techniques you might like in miniature painting. Things like edge highlighting, weathering, chipping, battle damage, and more.
People are already working on improving or iterating on SlapChop. You can find other creators with their individual takes on it. I’ll include Ninjon’s video here:
Technique Based Methods of Painting Warhammer and Other Miniatures
I wanted to include a section here for people to understand that many painters use a mix of techniques to come up with their finished result. What they use depends heavily on the subject they are painting, and the outcome desired.
For example a smooth gradient of color is a specific outcome that can be reached in multiple ways. A metallic look can be achieved with either metallic paints or a technique called non-metallic metal (NMM).
You might look at your miniature and say you want to use X, Y and Z techniques to get to your outcome, and that then is your method for that project. This is especially helpful if you are painting more than one model in a similar way.
For example a squad of 10 Space Marines would look great if done with the same method. Document your colors and steps and repeat it for all the models.
So let me lay out some of the most used techniques in the miniature painting hobby.
Wet Blending: An intermediate to advanced painting technique in which you blend two or more paint colors together to form a gradient. The idea is to accomplish this while the paint is still workable and “wet”.
Since acrylics tend to dry quickly, you can add a dry retarder medium to increase your work time.
Wet blending is a very common technique in oil painting. Since oil takes a very long time to dry compared to acrylics they’re easier to work with and blend for that reason.
Pin Washing: This is an easy technique to pick up for beginner to intermediate painters. Pin washing, also known as panel lining is the process of adding a black or very dark paint to the very deepest recesses of a miniature.
You can make your own wash or buy a pre formulated product that comes with it’s own applicator. Any paint will work but oils and enamels do seem to work better for this technique.
I personally use Tamiya Panel Liner and highly recommend it. Simply touch the applicator to the recesses and the enamel will run right into the panel lines, turning it black. That makes the lines much cleaner and easy to pick out. Your miniature will instantly go up a level in quality.
Zenithal Priming: Beginner to intermediate level technique that I go into depth on here. This is the process of priming or base coating your miniatures in black, and following up with a spray of white paint from above to simulate light.
The result is a representation of shadow and light on your miniatures that look very realistic. I highly encourage readers to try this technique out. You can do this with an airbrush, spray can or paint brush.
Zenithal priming is used in many popular methods like SlapChop and Speed Painting.
NMM metallics: NMM is an acronym for Non Metallic Metal. This is an intermediate to advanced technique that has you using standard paints to simulate a metallic look. Yellows and browns to simulate gold, greys and blacks to simulate steel, and so on.
It’s challenging to accomplish but can be very rewarding if done well. This is an example from Sergio Calvo:
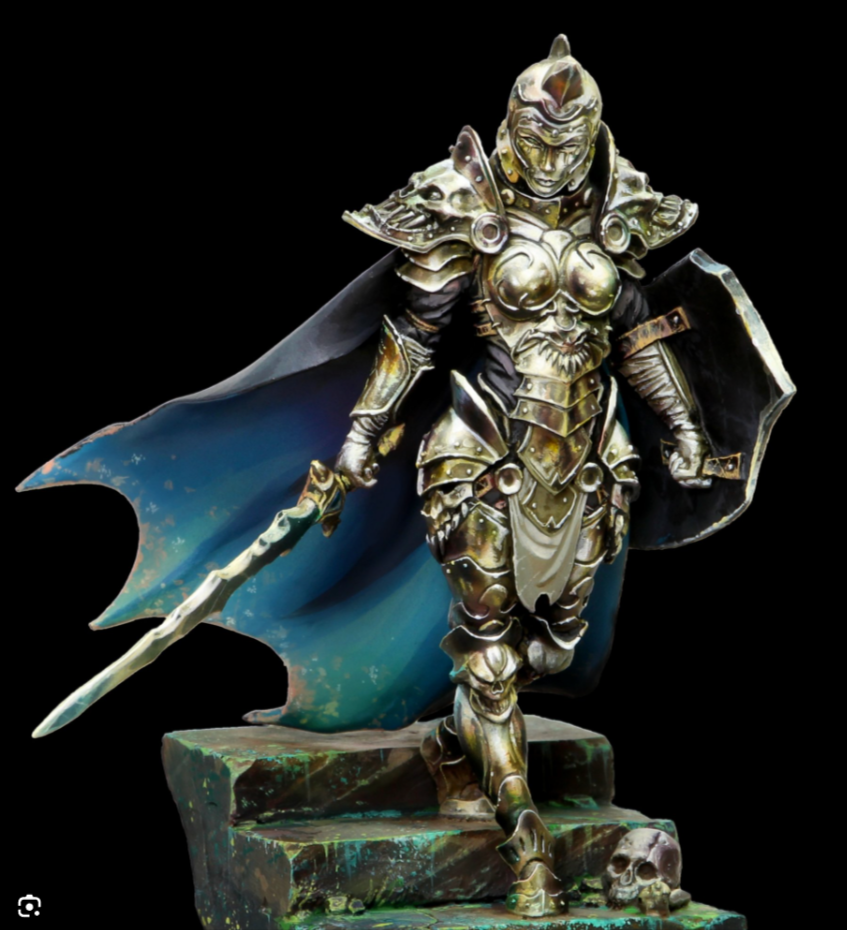
That is insanely impressive to me. Sergio has used yellows, browns, and silvers to achieve a look that really simulates metals. It’s a very realistic look, as opposed to true metallic metal paints, which really need shading and washes to make them look good.
All the models I have in my Gallery are in true metallics. With the exceptions of some power swords that are done in a type of NMM.
Dry Brushing: This is a beginner level technique I go into depth on here. Using a paint brush with a broad tip, you take a small amount of paint and brush most of it off on some paper towel. With the small amount left on the dry brush bristles, quickly stroke the high points of your miniature back and forth or side to side.
This deposits a light dusting of color onto the high points and adds contrast. Dry brushing is another technique that is often used by people looking to speed paint or in methods like SlapChop.
If you’re just starting your painting journey, this is a good technique to learn.
Contrast Paints: Meant to be a beginner tool, this category includes all the paints of this type. Citadel Contrast, Vallejo XPress Color, Army Painter Speed Paints and more.
I would call contrast as a technique beginner to intermediate. You can do a lot with these paints, and they are simple to use. More challenging to master and get a great result.
Contrast paints are another ingredient to the SlapChop method. They are excellent at providing a lot of color, along with some basic light and dark contrast.
Feathering: Feathering is an intermediate level technique in miniature painting. Paint is applied to one side of the surface and then lightly spread over the remaining area with short quick strokes called feathering.
The goal is typically to get a gradient of one paint color over another. This is fairly easy to accomplish at a basic level but a smooth transition takes practice and skill.
Layering: Layering is a basic method of adding paint to a miniature. It is simply the process of adding one layer of paint onto the miniature. This can be over bare plastic, over a primed model, or any amount of initial layers of paint.
The goal is to add layer over layer of paint to achieve the look you want. You can highlight, create gradients, transition between colors and more with layering.
When you hear the advice: “Two thin coats.” They are talking about layering. Layering also has to do with the thickness of the paint.
Acrylics straight from the bottle is typically thick, adding water thins it down. At a certain point the thinned paint goes down to a glaze or wash consistency. Layering is somewhere in the middle of watery thin and thick.
Glazing: Glazing is a beginner to intermediate technique that uses a very thin coat of paint that allows the underneath layers to show through. Glazes are so thin, they have translucent or even transparent properties.
Glazing yellow over a blue for example, would show green. A mix of both. While a thick layer of yellow over any color, would just show yellow and completely cover what is underneath.
Washes and Shades: Washes and Shades are interchangeable terms. This is a beginner technique and highly recommended if your goal is to get some painted miniatures under your belt.
I go into details on washes here. In short, they are a very thinned down acrylic or oil paint. You apply them over a miniature and they flow into the deepest recesses. This gives a very good representation of shadows on the miniature, and by contrast the original color you apply the wash over looks lighter.
Washes are similar to contrast paints, but thinner. Different colors are used for different looks. For example a brown wash adds a gritty grimy look, perhaps for a D&D or Warhammer model that’s been fighting or out in the wild.
Black is a great all around wash to simulate shadow, which is why you might run into people discussing “nuln oil“, Citadels black wash.
Speed Painting Methods of Painting Miniatures and Models
Speed Painting is not a specific method. Rather it is a set of techniques, shortcuts and processes that make painting models quicker.
Speed is a relative term. If you consider 4 hours a typical amount of time to finish painting, cutting that to two hours would be faster.
Some terms, techniques and context to be aware of with speed painting:
Assembly Line painting: This is simply lining up a group of miniatures and doing one section on each of them, one after the other. For example, painting the leather bag on each of them. Then the boots on each. Then the armor. It is quicker and more efficient.
Color Scheme: This is a list of colors and specific paints you will be using. Thinking about color scheme will impact the time it takes you to paint your minis. Less colors means less steps means less time to completion.
Note that Warhammer rules require at least 3 colors at official events, but realistically that’s a low bar and only if you are going to official events.
Speed Painting Techniques: These are just painting techniques that are considered fast ways of achieving good quality results. They include: Zenithal Priming, washes, dry brushing, and contrast paints.
Speed Painting Tools: This is just my quick category for things like: Airbrushes, spray paint, large paint brushes and dry brushes. They are all tools that help you get paint where you want it quickly and efficiently.
Example Speed Painting Plan:
For this example let’s say you want to paint this set of 10 Warhammer Assault Intercessors. Your goal is to get them done to a tabletop ready standard. They should look good but not take too long to finish.
Step 1: Prep. We will clip, glue and assemble all 10 miniatures so they’re ready to paint.
Step 2: Color scheme. We’ve decided we’re looking for the general look of the box art. Blue Ultramarines. We choose our specific colors, trying to keep the number fairly low to save time.
We further need to decide what the bases will look like, we’ll keep it very simple. I’m also including a spray paint for the blue to save time, but if you have an airbrush that’s even better:
- Citadel Macragge Blue Spray Paint Primer
- Vallejo Metal Color Silver
- Vallejo Model Color Black
- Scale 75 Elven Gold
- Citadel Snakebite Leather Contrast
- Citadel Mephiston Red
- Citadel Screaming Skull
- Citadel Nuln Oil Shade
- Vallejo Thick Mud Texture Paint for the Base
Step 3: Prime and Base Coat. For this example we’re going with either the spray can or airbrushed on MacCragge Blue. Fully base coat each of the 10 Marines.
Step 4: Metallics. Assembly line, one at a time, you will paint the gold trim on each marine. Then starting at the first, do all the silver work on the gun barrels, saw blade teeth and anywhere else. Finish one, go to the next, repeat til done.
Step 5: Black Paint. You could black out anything that isn’t blue prior to metallics, but to save time we will just do the items that will be black. Usually weapons. Bolter guns, swords and so on. Again you will do one, then the next, in assembly line manner.
Step 6: Red Paint. Pick out the eyes, and purity seals. Anything else red you want to add. Once again the goal is assembly style, do one then the next til completed.
Step 7: Off White Paint. This is the screaming skill on the purity seals where the text is on parchment.
Step 8: Washes and Shades. Take your Nuln Oil and apply to the recesses of the armor. Also to any silver metallics you have. You can also use it on the gold, or if you have a sepia wash like Seraphim Sepia, or even better some thinned down Guilliman Flesh Contrast Paint, those look great on Gold metallic paint. Any sepia wash will work.
Step 9: Base and Touch Ups. For the base, you can use whatever you want. Or nothing at all. A simple base goes a long way to making them look like a team. For this example I picked Vallejo Thick Mud texture paint. You literally just scoop some out and spread it on the base. Let it dry. Done.
Of course you can add tufts, paints, pigments or anything else to spice up the base.
And that’s it! You’re done! You can varnish them if you want to, but beyond that ready to hit the table.
Four Styles of Painting Warhammer 40k and Other Miniatures
When we talk about style, it’s more of a vibe on what they look like. Do they look crisp and fresh, really well defined? Is it more dark and gritty, with a bunch of battle damage, blood and dirt on them? Or something else altogether? Lets go….
Clean Style of Painting Warhammer and other Miniatures
Clean is just that, fresh and crisp. Everything is smooth, no paint where it shouldnt be. It’s often black lined (panel lining/pin washing) to create those hard breaks between sections.
Clean is exemplified by the box art on warhammer miniatures:
Grimdark Style of Painting Warhammer and Other Miniatures
Grimdark figures look like they’ve been fighting Xenos and Heretics. A lot of them, and very recently. They have chips in their armor. They have dirt on their tabard. They have blood and gore on their swords and bolters.
Here is Richard Gray’s take on a pair of Grimdark Imperial Fists:
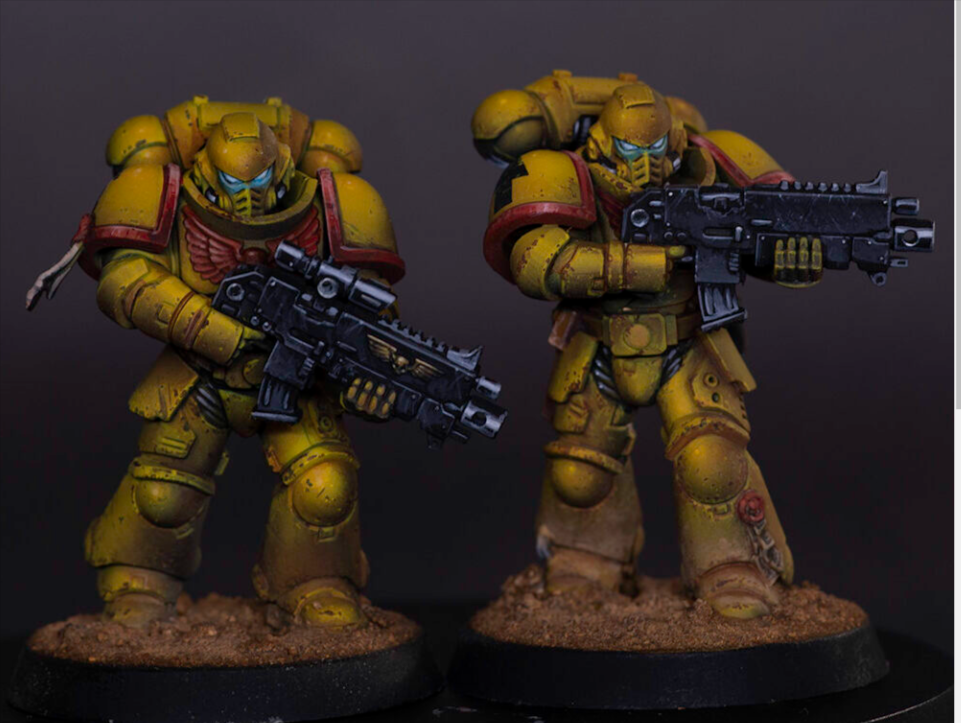
They look sick. Super cool style that I am not yet very good at but I’m working on it. You can find Richard Gray videos on YouTube.
And finally here is a really good video on another take for Grimdark Imperial Fists:
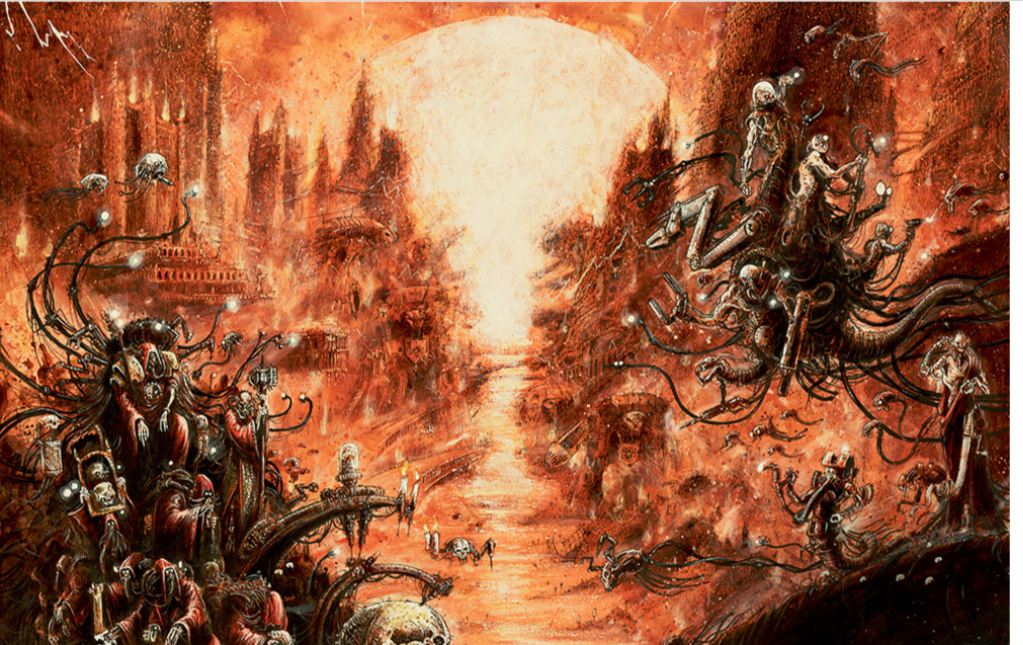
Blanchitsu Style of Painting Miniatures and Models
Blanchitsu is based on the art of John Blanche. It’s a style that can sometimes be used interchangeably with GrimDark style. He paints and draws in reds and deep yellows, blacks and greys. It is typically gritty and dark in general, with some very bright areas
Here’s an example:
A video of Duncan Rhodes doing Blanchitsu can be found here:
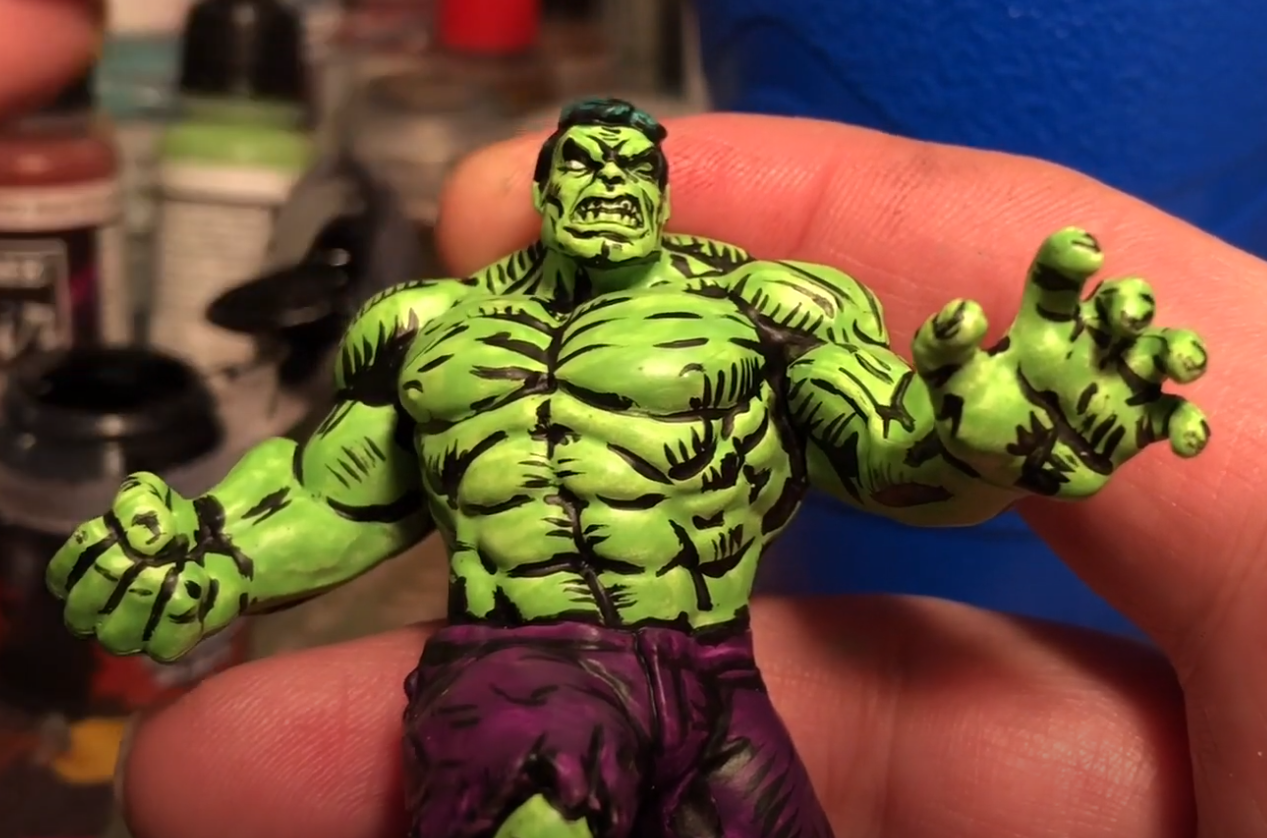
Comic Style of Painting Miniatures and Models
For comic style I tend to think of Marvel Crisis Protocol Miniatures as opposed to Warhammer. But it’s worth knowing this exists.
Comic style has an exaggerated look, sometimes washed out, others bright and clear. A good video on for Captain America:
And here is a really exaggerated hulk:
So as you can see, we’ve covered a lot of ground. Warhammer Painting is art, and art is an endless expression of your vision. You can achieve similar looks in a lot of different ways. You can also choose from many different styles and finished looks.
I hope this has helped and as always, let me know if you have questions!