How to 3D Print Miniatures in 2023 (Now Its Easier Than Ever)
3D Printing Your First Miniature – Quick Start Guide
How to 3D Print Miniatures: 3D printers for miniatures use either resin (SLA) or plastics (FDM) to print items. To print your first model you will need access to a printer, a computer to run slicer software, and the appropriate material to print with (resin or plastic filament). You will also need a 3D file of the miniature or model you intend to print. These are called STL files and can be found either free or paid on many sites. The STL file gives instructions to your printer which then can print your miniature.
Everything you need to start 3D printing some fun miniatures for your tabletop games is here for you. Getting started is easier now than ever before because FDM and resin printers are getting much more advanced.
Even the very best 3D Printers are becoming more and more affordable. You can get really high resolution prints for not a lot of money.
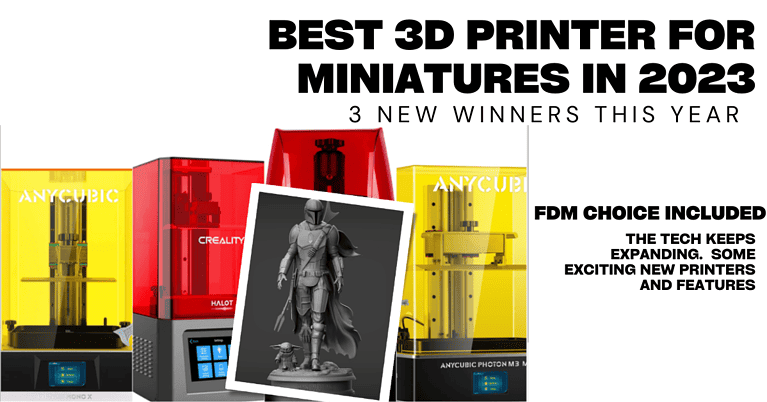
Big brands like Anycubic, Elegoo, Prusa, Bambu, Creality and more are finally past the stage of making the same exact machine but a tiny bit cheaper. They are now looking to make it easier to get started with 3D printing.
They are adding better features, making the machines easier to set up, less print failures, improving print quality and achieving faster build times.
Quick Start Guide to 3D Printing Your First Miniature:
For our guide if you don’t have a specific miniature in mind, I suggest you try a free, supportless miniatures to start. I personally like these D&D Miniatures by Tierale, but anything without supports is a good starter print.
Supports are small resin or plastic structures that hold up parts of the object being printed. They look like scaffolding on a building that is being constructed.
Once the print is complete you would remove the supports. So a “supportless” miniature would be something designed to not require any supports. It makes the process a bit easier for a first print.
If the model you want to print has supports, no problem at all. They are very common and wont be an issue. Its just a bit more clean up work at the end.
I will go through the process for both Resin (SLA) and Plastic (FDM) 3D printing.
Printing with an SLA 3D Printer:
I know new technology can be intimidating. I don’t want you to be overwhelmed so let’s start with a quick summary and then get to the full guide.
How to 3D Print miniatures in Resin:
A Basic Summary of Resin 3D Printing:
- Download an STL file from thingiverse or somewhere similar.
- Load that STL into a 3D printing app on your computer called a slicer.
- Run the slicer with the settings you want
- Take the sliced file and get it onto your printer (USB drive or over wifi)
- Fill the printer with resin.
- Hit Print.
That’s it. Now there is some nuance with settings, supports, and some more variables. Overall though, simple files are simple to print. The examples I give above shouldn’t be tough at all for you. Most printers will be able to do it out of the box.
Now that I hopefully have showed you it’s not too challenging, let’s get into a bit more depth with my step by step guide to 3D printing miniatures with resin:
8 Step Guide To Printing Your First Resin 3D Miniature
- Printer Set Up:
- All resin 3D printers require a bit of set up but it has gotten much easier as the technology advances
- Typically you’ll need to perform a few steps like adding the build plate and installing the resin vat, both very simple processes. You simply screw them on and tighten with tools provided by the manufacturer.
- You also will typically have to level the print bed, which is as easy as pressing a few buttons to allow the printer to self level.
- Gather your materials:
- Other than the printer itself you will need resin to print with, and an STL file of whatever you want to print.
- Protective equipment: nitrile gloves, safety glasses, and if you want a mask or respirator.
- Prepare the digital 3D model:
- You can create your own, or download an STL file. Again our example is one of these free models.
- Open your STL file with a slicer program that is used to generate the print file for your specific printer.
- Popular slicers include Chitubox, Lychee, and PrusaSlicer. All of which have free versions that can do what you need to do.
- You will see a 3D rendering of the model inside the slicer.
- Set up the printing parameters:
- You can set things like resin type and more inside the software.
- Slicers allow you to configure things like layer height, exposure time, lift speed, and more. For example ChiTuBox recommends .05mm layer height, and generally between 1.5 and 3 seconds exposure time. You can adjust as needed.
- Slicers are also where you can decide if you want to hollow the model to save material, add supports if needed, or add a “raft” which is a small resin platform to support the whole model.
- Once you’re happy with the settings you can hit “Slice” which will just convert the STL and your settings into a file ready to print.
- Import the print file:
- Load the sliced print file (usually saved as .SLC, .CBDDLP, or similar) into the printer itself.
- Many printers have USB drives you can use to load the sliced file into the printer. Or some allow you to connect your computer to the printer to transfer files.
- Fill the resin tank:
- Open the resin container and pour the resin into the printer’s tank.
- Don’t over fill and make sure the resin tank and printer itself is level.
- Start the print:
- With the file loaded onto the printer, and resin in the vat, you’re ready to go.
- Find the file on the printer and hit PRINT
- Post-printing:
- Once the print is complete, you need to remove the build platform from the printer. Simply unscrew the thumb screws and pull it off.
- Use a scraper to gently scrape the print from the build platform.
- Rinse the printed miniature in a container filled with isopropyl alcohol (IPA) to remove excess resin.
- Allow the object to cure under UV light or sunlight. In bright sunlight a miniature will usually cure in a couple of hours. You can also buy a curing station or some UV lights to cure your prints.
Printing with an FDM Printer:
FDM printing has been around longer than SLA/Resin, but it’s only just now seeing a surge in “ease of use”. FDM printing can be more challenging, and require more tinkering. Bed leveling, layer height settings, diagnosing failed prints and more.
Having said that, the newest generation of FDM printers are much more user friendly. They work well out of the box. They are faster. They have much more intuitive user interfaces, and much fewer failed prints.
And, FDM printers have advantages in cost/size ratios as well as more versatility in materials. Meaning dollar for dollar you can print bigger items on FDM printers. You also have a bigger choice of materials like harder, softer, stronger, flexible, and other properties.
How to 3D print Miniatures with FDM printers:
A Basic Summary of FDM 3D Printing:
- Download an STL file from thingiverse or somewhere similar.
- Load that STL into a 3D printing app on your computer called a slicer.
- Run the slicer with the settings you want
- Take the sliced file and get it onto your printer (USB drive or over wifi)
- Load the printer with the filament of your choice.
- Hit Print.
Very similar process to resin printing right? All 3D printers work in roughly the same way: you take a 3D model, put it in a slicer and load it into the printer.
They just use different materials and processes to achieve the final result.
For FDM, it’s more like squeezing liquid melted plastic out of a tube. Very similar to a glue gun if you’ve ever done any crafting.
Ok let’s get to the guide:
8 Step Guide To Printing Your First FDM 3D Miniature
- Printer Set Up:
- Assemble, level, and calibrate the printer per instructions.
- Assembly and set up is highly dependent on which printer you buy.
- Printer kits require more assembly, others are almost ready to go out of the box.
- Gather your materials:
- FDM 3D printer itself
- Filament of your choice (PLA is most common but there are many varieties).
- Protective equipment: nitrile gloves, safety glasses, and a dust mask or respirator if needed.
- Prepare the digital 3D model:
- Design or download the STL file of the 3D mini or model you want to print.
- Load that STL into the slicer of your choice ( I like Chitubox for resin printing and PrusaSlicer for FDM).
- Set up the printing parameters:
- Open the file in your slicer and check through settings.
- Select the appropriate printer model and adjust the settings if needed (layer height, print speed, infill density, etc.).
- Choose the filament type and adjust temperature settings accordingly.
- Slice the file to get it ready for the printer
- Import the print file:
- Load the sliced print file (usually saved as .GCODE) onto a USB drive if your printer doesnt support wifi.
- Use the USB to load the sliced file onto your printer.
- Load the filament:
- Load the filament spool into the printer’s filament holder or feeder mechanism.
- Wait for the printer to reach the desired temperature for the filament.
- Start the print:
- Find the file on the printer and hit Print.
- Keep an eye on the initial printing process to make sure it’s going well.
- Look to make sure it’s sticking to the print bed, and layers are being applied correctly.
- Post-printing:
- Once the print is complete, let it cool down on the build plate before removing.
- Carefully remove the miniature from the build plate using a scraper or spatula or similar tool.
- Clean the miniature if necessary, removing any supports or excess filament.
- Finally comes any post-processing, such as sanding, painting, or smoothing.
So again while older, less expensive FDM printers are a bit challenging to get going, you absolutely can start 3D printing with one. There are tons of miniature models out there to print, and plenty of communities, instructions, videos and more on how to use your specific printer.
While I still prefer resin for miniatures, an FDM printer will absolutely come in handy. Big items like cosplay gear, terrain for tabletop gaming, figurines of your favorite comic book characters or models, and many more prints can be done with FDM,
With a small enough nozzle you can get smooth results and improve the quality of the miniature.
I’ll be doing more articles covering common 3D questions, optimal settings, creating miniatures by scanning and modeling, how to troubleshoot and more.