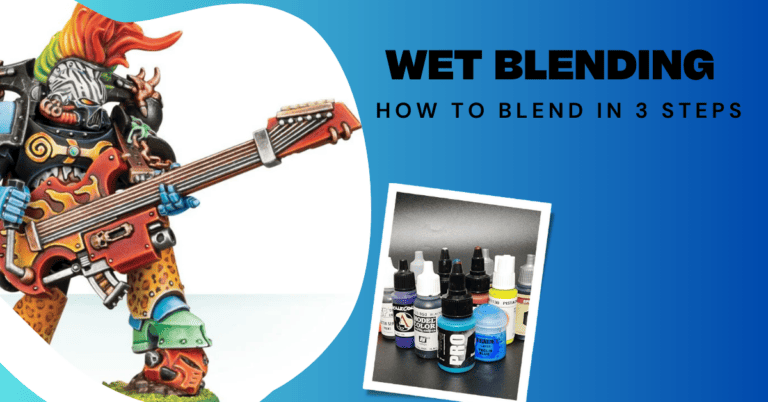
How to Add Highlights to Miniatures With a Brush or Airbrush
Highlighting Your Miniatures Takes Them to the Next Level
Highlighting is simply adding a lighter shade of color to your miniatures. It is meant to mimic the effect of light falling on surfaces. To get a simple sense of this, you can put your miniature under a lamp or other light source. You’ll see where the light lands gives the shades of color a brighter look.
We will go through how to achieve that effect with a paint brush or airbrush. It’s a big step forward when you are looking to start painting miniatures.
Takeaways
- Adding Highlights to your miniatures gives an added sense of depth and realism
- You can apply highlights with a brush or airbrush
- This process can be very simple, but more advanced methods give a better look
- Learning where to place highlights (and shadows) is a skill you can master over time
What you’ll need for adding highlights with a brush
- Any paint brush will do for this technique although a nice sable brush would make it easier.
- A base coated miniature.
- The same acrylics you used for your base coats, plus something to lighten it with like white or ivory. OR other paints in lighter shades than your base coats.
- Water or other thinning mediums like flow improver or glazing medium.
Set up: Applying highlights with a brush doesn’t require anything special. Any paint brush can do the job, although it’s likely easier to get a smooth clean application with a nice sable brush. Some water and/or thinning medium just to get a good paint consistency and you’re in good shape.
Paints: The paints you use are probably the biggest consideration. What you want is a lighter color paint than the base coat. So if you base coat in Citadel’s Calgar Blue, you want a slightly lighter color than that blue to highlight with. Citadel (and all other paint brands) sells individual paints that are designed to be highlights of other colors. In this case Citadel recommends Fenrisian Gray as its highlight. Fenrisian Grey is a very light blue, but you can just make your own highlight.
To make a highlight of any color, simply add white or off white to it in small amounts. The more drastic the color shift, the more difficult it will be to blend it in.
Steps for Adding Highlights to Miniature with a Brush
- Choose your highlight color – It should be a shade brighter than your base coat
- Determine where you want to place the highlights. You can hold your miniature under a lamp to see where the light falls naturally as a starting point.
- Thin your paint down to a point where it is translucent: roughly 2 drops of water or thinner to 1 drop of paint
- Load your paint brush with thinned paint and dab the excess on a paper towel to prevent the paint running.
- Apply very thin layers of the highlight color in the areas you chose in step 2.
- Use brush strokes in the direction of the brightest highlight, this is typically the highest point closest to the light source. So you’ll always be brushing in strokes towards the top of the surface.
Highlight Color Choice: As we covered above you’re simply looking for a lighter shade of whatever color you used to base coat. Many brands of paint have specific colors to be used as highlights and shadows. Citadel will list it’s color suggestions on the models pages. Simply go to Games Workshops site, find your model, and scroll down to the How To Paint section.
Reaper paints have sets they call Triads. It’s a mid tone, shadow and highlight. Perfect for someone looking to take the guesswork out of it. An example is here:

So using the above, the Leaf Green is the base coat, the Pine green would be shadow and the Pale Green is your highlight color.
Where to Place your Highlights: I have three tips for you here: Find examples, hold the mini under a light and zenithal priming with a spray can or airbrush.
What I personally do is look for other examples of the model I am painting. It’s helpful to see what others have done. Box art for example, or instagram, or a simple google image search for your model.
The other tip I found super helpful was simply hold your miniature under a light and look at where the natural highlights land. This works best with a black primed miniature but you can do it at any stage.
Finally, Zenithal Priming is a perfect way to get basic highlights and placements on your miniature. In short, a zenithal prime is typically a black primed miniature, and spraying white from the top (or zenith) which simulates how light falls on the figure.
Adding Highlights with a Brush: Once you know where to place the highlights and what color to use, it’s a simple matter of layering the paint over your base coat. While this is a simple concept, the execution will span from basic to expert.
Get your paint on your palette, thin it down a bit more than you did with your base coat. A thinner paint allows more transparency and it will blend with your base coat better. Load the brush with paint and blot excess on a paper towel.
When you do apply the paint, generally try to identify what the brightest point would be. A great book that covers this is Color and Light by James Gurney. But you should be able to see it via the methods you used above: e.g. hold it under a light or look at what others did.
Now that you know the brightest point, try to always be pushing the paint towards that spot. So if it’s a circle with the brightest point in the middle, you’re always starting at the edges of the circle and your brush stroke moves to the center.
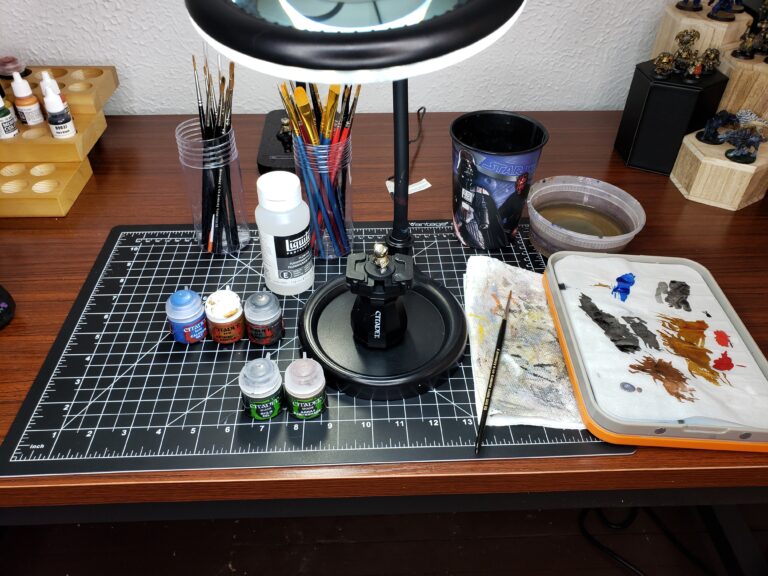
What you’ll need for adding highlights with an Airbrush
- An airbrush and compressor set up, along with an area to do your priming
- A base coated miniature
- A highlight color picked out for application, properly thinned for an airbrush
- Understanding and identifying where you want to place your highlights.
Airbrush Setup: Pretty straight forward here. I have my airbrush all set up with a spray booth in my office. It vents out the nearby window so I’m good to go.
Base Coated Mini: Here we’re just looking to get our primed and base coated miniature ready to go for highlight stage.
Highlight Color: As with the brush method (see above) you want to identify the color you’ll use. So either the recommended highlight color by the brand of paint you’re using, or just use the base coat color mixed with a little bit of white or off white to lighten it up.
Where to Place Highlights: The same 3 tips for you here:
- Holding the miniature under a light to see where they highlights land.
- Looking at what others have done with the miniature for ideas
- Zenithal priming the miniature to see where highlights fall.
Steps for Adding Highlights to Miniature with an Airbrush
I’m going to cover 3 Methods here: Spot Highlights, Zenithal, and advanced Zenithal.
Method One: Spot Highlights
Spot highlighting is simply using the airbrush to spray on specific areas to highlight. The idea is to spray thin layers in small bursts to achieve the look you want.
- Load your airbrush with the highlight color desired.
- Paint should be very thin to achieve a smooth finish.
- Spray in short, controlled pulses over the area you’re looking to highlight
- You can practice on a piece of paper to get a good feel for the way the paint sprays
- Start with a broader surface area. As you add more layers make the surface smaller and smaller, so the point with the most highlights has the most layers of paint.
Here is my Ultramarine with a spot highlight on his forehead above his eyes. I did this with my Iwata HP-CS airbrush:

Method 2: Zenithal Highlighting
Zenithal Highlighting is what I’ve been using recently and I really love the look. Just like with a Zenithal Prime, you’re base coating in one color, and then spraying the highlight color from above to achieve a smooth look. It’s also a quick way to get a high impact, high contrast look, with very smooth gradients.
- Start with a base coated miniature in the color of your choice.
- Load your airbrush with the desired highlight color, thinner is better for a smooth application.
- Spray your highlight over the miniature from above (the Zenith) to mimic light coming down.
- You can choose to apply more or less depending on the amount of highlight you want to achieve.
- Layer on more paint at the highest/brightest points of your miniature
This is my Horus Heresy era “Beakie” Space Marine highlighted with Zenithal Highlighting

Method 3: Advanced Zenithal Highlighting
This is very similar to the previous method, but you’re subbing in another step: Zenithal white. So you’ll do base coat, zenithal white to lighten your base coat, then going over with a transparent ink. The effect is awesome.
- Base coat your miniature in the desired color
- You can add darker recesses with blacklining/pin washing if desired
- Spray thin coats of white (Tamiya Flat White is highly recommended) in the direction of the light source
- Once highlighted in white, use a transparent paint or ink like Vallejo Transparent paints to add a very thin filter over the top of the miniature.
Here is my Terminator after he was base coated Red, then sprayed from the top with White:

And here is after the Vallejo Transparent Yellow was sprayed over him, you can see the darker areas yield almost orange:
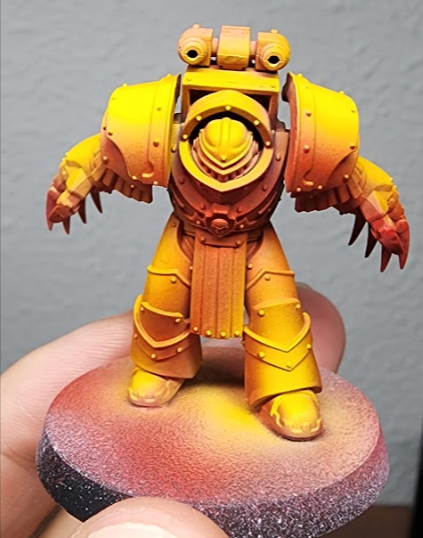
And the final result after adding in the other colors:

These were for my Warhammer 40k Imperial Fists army. So the above is a pretty quick method to get a high level result. I did 10 of those terminators, 5 “beakies” and a tank. It didn’t take me ages because I had an airbrush do most of the hard work, in this case the yellow armor. From there it’s just black, metallic and the brown leather with a brush.
Other Considerations
A more advanced tutorial that uses a lot of different techniques can be found here:
Pay attention to the base coating and highlighting sections. You’ll see: Base coats, pin washing, dry brushing, weathering, zenithal highlights, and more!