How to prime miniatures and Models: Brush, Spray Can and Airbrush
Easy methods for a perfect prime
Takeaways
- Priming miniatures can be done with a Spray Can, Brush or Airbrush.
- Brush method is simple and inexpensive, but the most time consuming.
- A Spray Can is simple, inexpensive and quick but it requires an outdoor or ventilated space. Not as much versatility or control as the airbrush.
- The Airbrush has the highest upfront cost, but is the quickest and smoothest application with the most control. An airbrush can be used for a lot of miniature painting techniques.
- In all cases the goal is to apply nice, even coats
- Apply a second coat of primer only if needed.
I will Cover:
- Priming miniatures with a Spray Can
- Priming miniatures with a paint brush
- Priming miniatures with an airbrush
- Choosing colors to prime your miniatures with
How to prime your miniatures with a Spray Can
What you’ll need:
- A spray can of acrylic primer in the color of your choice
- An outdoor space to prime, or an indoor space that is well ventilated and protected from any over spray of primer.
- Optional: A painting handle of some kind to make it easier to hit the miniature from all angles without getting your fingers all over it. You can also fix multiple miniatures to a section of cardboard or wood to hit multiple figures at once with the primer.
- Optional: A pair of latex gloves or similar to keep the primer off your hands
How to apply Spray Primer to Miniatures:
Miniature Preparation: I will start by saying I almost never have issues priming, and don’t do much prep of my miniatures. But some brands I’ve had trouble with. The bottom line is to make sure your miniature is clean.
Many miniatures and models are made in molds. Mold release agent is often used in the manufacturing process to get them out of the mold easily. If that release agent is still on the miniature the primer wont stick as well as it should.
A light cleaning with a tiny bit of dish soap and a cloth or soft tooth brush does the job.
Location: I’ve only used spray cans outside. Anywhere ventilated works for me. Just realize you might get overspray on whatever is nearby.
Shake the Can: Make sure the can is really well shaken. You also ideally want the temperature you’re spraying in to be fairly mild. Not too hot and humid, not too cold. It doesn’t have to be an ideal climate, but it’s something to be aware of if you get a bad result.
Short Bursts: You want short even bursts of spray. Spray in short passes right to left or up and down. Dont hold the spray down. This leads to clogging, uneven application, patchy results and a thick layer that will obscure details.
Apply the spray from all angles to make sure you get full coverage.
Summary: Shake the spray primer well. Go outside or in a well ventilated area. Take a clean miniature on a painting handle and apply quick even bursts side to side or up and down. Make sure you hit it from all angles to get full coverage. Once dry, if you notice you missed some spots, you can apply a second coat of primer.
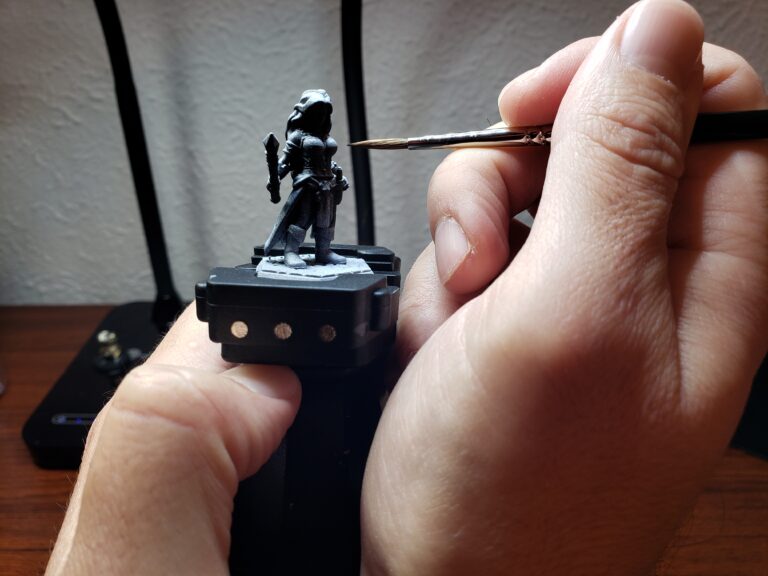
How to prime your miniatures with a Brush
What you’ll need:
- Acrylic Surface Primer made for miniature painting
- A natural or synthetic paint brush
- A cup of water
How to apply Acrylic Primer to Miniatures with a Brush:
Miniature Preparation: Miniature prep will be the same no matter what method you use. You want it clean with no release agent, oils, mold lines, or stray plastic and resin. Depending on where you got your miniatures the prep will differ. Either a brand like Games Workshops Warhammer 40k, or Reaper, or maybe you 3D printed your own.
Just make sure it’s smooth, clean and dry and you’re good to go.
Location: The beauty of a paint brush method is you can do this anywhere. A dedicated hobby desk or wherever you can find a flat surface to work on. I would just say put a hobby mat or something on the desk to protect it from spills or drops of primer.
Brush Strokes: The key here is to find a quick, smooth pace to apply the primer. You don’t want to be rushed, but at the same time slow deliberate strokes with thick primer will leave streaks.
As always the greatest teacher is experience. Give it a try. It’s not difficult at all.
Summary: Clean and prep the mini. Put a couple of drops of primer on your palette. Grab a larger size paint brush and apply the primer in even strokes. Once dry, if you notice you missed some spots, go ahead and apply a second coat to cover the areas you missed.
How to prime your miniatures with an Airbrush:
What you’ll need:
- An airbrush, air compressor and a hose to connect the two.
- Acrylic primer in the color of your choice. I recommend Stynylrez or Pro Acryl.
- An airbrush spray booth or area that is well ventilated to catch any over spray from the airbrush.
- Airbrush cleaner or water to clean the airbrush when you’re done
- Flow improver and/or Airbrush thinner is not 100% necessary but it’s very helpful to the process.
How to apply Acrylic Primer to Miniatures with an Airbrush:
Miniature Preparation: Same as with the other methods you’ll want a clean dry miniature that has no stray mold lines, plastic or resin on it. If needed you can clean it up with an old soft toothbrush, some dish soap and water.
Location: The airbrush method of priming really requires a dedicated space. You’ll want a well ventilated area that is protected from overspray. This can be a simple as a cardboard box near a window or source of fresh air, with some PPE like a simple inexpensive respirator mask.
I personally use a dedicated airbrush spray booth that has an exhaust fan on it connected to my office window. I also wear an old covid mask when spraying.
Thinning your acrylic Primer for airbrush use: My personal routine when using my airbrush for anything is to shoot a bit of flow improver through the clean airbrush before doing anything else. It lubricates everything and prevents clogs by stopping the paint from drying quickly inside the brush. So I would recommend doing that regardless.
To further thin the primer, this is what I used for Vallejo Surface Primer: 3 drops of thinner to 10-12 drops of primer. It seemed to help with clogging while giving good coverage.
I have since switched to both Stynylrez Primer and Pro Acryl Primer. I would recommend both and I dont thin either of them. Just pour and go.
Airbrush Strokes: There are a few different types of airbrush triggers so we’ll cover that in a second. Overall you want to achieve a similar delivery of primer that you do with a spray can. Short even strokes up and down or back and forth. It really helps if you have the mini on a painting handle or similar holder. This allows you to hit the miniature from different angles.
For the airbrush itself, dual action triggers are by far the most common for miniature painting. Dual action simply means when you press down on the trigger you get airflow. When you pull back on the trigger you get paint flow. It allows for a lot of control.
To apply the primer with a dual action trigger airbrush, you’ll want to try to keep the air on then pulse in the paint as you spray across the miniature. Hold the trigger down to keep the air on. Pull back gently as you cross the miniature, and push forward after you pass to shut the paint off.
Another way to say it is to hold the trigger down, then rock the trigger back and forth as you pass over the area you’re priming. It’s easier than it might seem.
For single action triggers you get both paint and air as you pull back the trigger. So you’ll keep the same idea, pulse it as you pass over the area you’re priming. Very much like a spray can.
There are other styles of airbrush, with pistol grips for example, but the method is the same: Smooth, short, even strokes. Don’t just hold down the trigger and spray constantly, that will clog the airbrush and give a bad result.
Summary:
I remember after getting my first airbrush I was a bit apprehensive about the whole thing. After giving it a try I immediately realized it was in fact very simple. I was certainly overthinking it! Once you are set up, priming with an airbrush is a simple as pouring a couple of drops of primer in the cup, press down and pull back. Easy!
The airbrush has a lot of upfront cost and consideration but it’s hugely versatile. You’ll need to invest in an airbrush and compressor as well as find, buy or DIY a dedicated space to spray in. Once you have that, the actual priming is very simple.
What Color to use when Priming your Miniature
Key Takeaways:
- The color you pick to prime with can absolutely make your painting process much easier.
- How you apply the primer (brush, airbrush, spray can) is irrelevant to the color choice.
- Black Primer is excellent for darker colors and makes shadows easier to represent
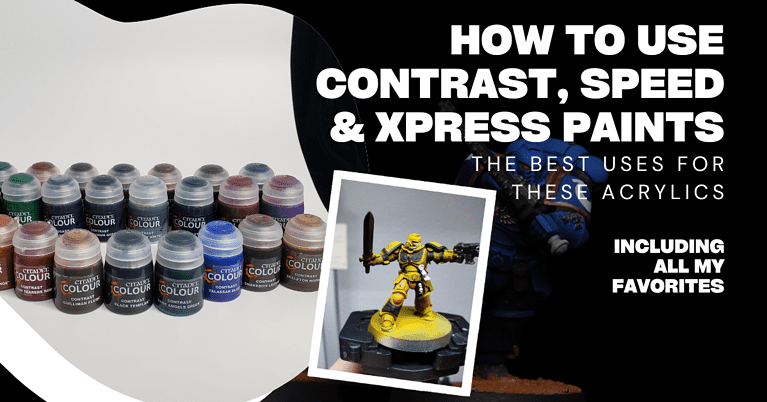
- White Primer is perfect for bright colors. A bright yellow or green is much easier to achieve with white primer.
- Grey Primer is the in between primer that is good for miniatures you will end up painting in a lot of different tones, colors and textures.
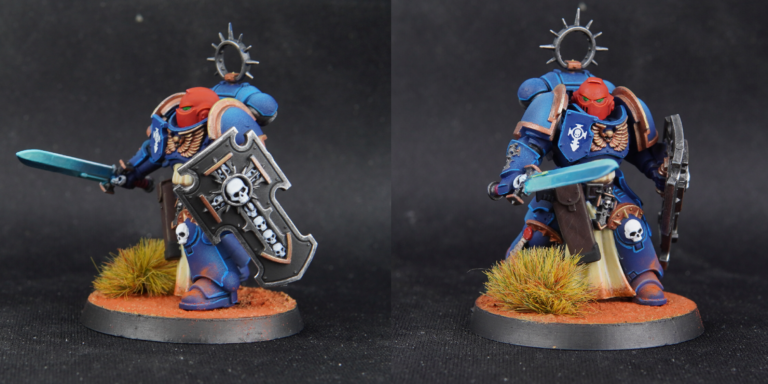
- Colored Primer is great if you have a single color that will take up most of the miniature. For example a WH40k space marine in blue, you can prime it in that blue.
My Rule Of Thumb on Primer Color Choices: If you’re looking to do dark muted colors, or you can’t decide on a color, prime in black. Bright colors will benefit from a White primer. Mixed dark and light, you can use gray primer. If the final result is overwhelmingly one color (think Space Marines) you can prime in that color.
Black Primer
If you are planning a darker colored finished miniature, Black Primer is ideal. Black is my go to primer if I can’t decide which to use. It has an added benefit that if you miss any spots with your base coats in the hard to reach creases, it will look like shadows.
If you’re looking to get a final result of a bright color, say yellow, then you should avoid Black. You’ll have to use a lot more layers to get coverage.
White Primer
White primer can be a huge time saver if you’re going for bright finishes. Personally I’ll only use white or black primer. More often than not I’ll do a Zenithal Prime in black and white. So if the final result is light colored robes, yellow or white armor, a bright green skin tone… prime in White.
Grey Primer
Grey is typically for miniatures that you’ll have a fairly even mix of bright and dark. I rarely use Grey Primer but that’s because I typically Zenithal in black and white. If you’re not doing that you can potentially benefit from grey.
Colored Primer
Colored primer is a great tool for quickly getting multiple miniatures done quickly. You can get the majority of color on your miniature and prime them in one step. Combine this with an airbrush or spray can and you can get a lot done in a very short amount of time.