How To Airbrush Miniatures and Models (My Favorite Tips and Techniques!)
Simple Explanations and Step by Step Techniques to Try
Article Takeaways
- Thin paint is critical to avoid clogs and for a smooth airbrush finish
- Start with simple techniques like priming, base coats and varnishing
- Learn to regulate the amount of paint you are spraying
- Try to pulse the application of paint in an “on / off” pattern as opposed to a steady stream.
- The distance you spray from will dictate the size of the surface you cover. Closer is a smaller diameter spray, further away increases the size.
My goal here is to give you as much as you need to know about airbrushing, in as concise an article as possible. I’m making this as easy as I can for you to find the answers you’re looking for, while still being thorough.
I’ll leave the set-up for another article, so we can focus on how to use an airbrush for miniature and model painting.
I will cover:
Starting Equipment: Including the actual airbrush, as well as paints and mediums you’ll use. My recommendation for beginner airbrush is the Badger Patriot 105 and a compressor like this Timbertech Compressor
Basic Airbrush Operation: Just the fundamental information to go from zero to one in airbrushing. How to thin paint for the airbrush. My favorite spray methods, and more.
Basic Airbrush Techniques: The most commonly used techniques in plain language. Pulsing, spray distances, air flow and more.
Starting Equipment for Airbrushing Miniatures and Models
- A dual action, gravity feed airbrush is ideal.
- A simple compressor, preferably with a tank for consistent pressure
- Paint or primer of your choice, typically acrylics like Vallejo
- Airbrush Thinner and/or Airbrush Flow Improver Medium
- A spray booth or somewhere to work that’s well ventilated
- A rebreather mask if necessary
- Cleaning pot and tools with Airbrush cleaning solution
The ideal miniature painting airbrush is a dual action, gravity feed airbrush and a compressor with a tank. Most paints will work just fine through an airbrush.
The biggest consideration is clogging, which can be avoided if you thin your paints properly. The use of drying retarders like flow improver help avoid paint sticking to the insides of the airbrush.
How to Use An Airbrush in Miniature and Model Painting
We will get into how exactly an airbrush works below, but I wanted to get right into the steps so it’s easy for you to find what you need.
Step 1: Turn on the compressor and set your PSI to somewhere between 25 and 30.
Step 2: Put 2-3 drops of Flow Improver medium in the cup, and spray it through the airbrush. This will lubricate the internal chambers and help prevent clogging and dry tip.
Step 3: Put 10-15 drops of paint or primer in the cup. Either pre-thinned airbrush paints or thin it yourself by mixing in airbrush thinner until you get a smooth but not watery consistency.
Step 4: Test spray your paint before applying to your miniature or model. Press down on the trigger to start air flow, pull slowly back on the trigger while holding it down to start paint flow. You can spray onto some paper towel to test.
Step 5: Once the paint spray is coming out cleanly you can start to apply it to the miniature or model.
Step 6: Spray from a distance of 6-12 inches away from the model. Spray in short controlled strokes across the model from different angles to get full coverage.
Step 7: Try to keep air flowing while you spray by keeping the trigger down. Alternate paint spray by rocking back on the trigger when you want paint to come out, and pushing it forward to stop paint flow.
Step 8: Apply your paint or primer and then allow it to dry. Don’t disturb the paint once it has begun to dry.
Once you’re all set up, it’s really as simple as pouring a bit of thinned paint in the cup and pressing the trigger down for air, then pulling back for paint.
Basic Airbrush Operation: How it all works
In this section we’ll put it all together in terms of components and what features are important when painting miniatures. So when you’re choosing an airbrush for miniatures, choosing airbrush paint, wondering what other experienced miniature painters use and why, you can have a deeper understanding of it all.
The Airbrush Compressors used for Miniature Painting
The airbrush compressor builds a supply of air that is stored in the mechanism or in an add-on tank. Typically in the miniature painting hobby we look for compressors with tanks. It gives a more stable air pressure and a more uniform result.
Once the pressure is established by the compressor, the airbrush is ready to be used. You will pour the paint in the cup on top to start. Once that is in place the trigger will be used to both start the air flow and to start the paint mixing into the air flow.
Airbrush Triggers: Dual vs Single Action Airbrushes
Dual Action Triggers have two axes they operate on: Up and down, and back and forth. The trigger starts in the up and forward position.
Pressing directly down on the trigger starts the air flow. Pulling (or rocking) the trigger back will release the paint into the airflow and atomize it, resulting in a fine mist spray.
Single Action Triggers operate in just the up and down axis. That single push will both start airflow and allow paint to flow into the air.
Miniature painting is easier and more effective with a dual action trigger. It allows for a lot more control over the amount of air and paint used. You’re also able to start with airflow, then mix in paint, then stop paint flow, and finally stop air. With that air going through the airbrush on both ends, you’ll have less drying internally and less clogging.
Internal Mix vs External Mix Airbrushes
Internal Mix Airbrush: This is what you’re looking for. The internal mix will allow paint and air to mix internal to the airbrush. It gives a much more even spray with a finer mist. Internal mix airbrushes are a bit more expensive but they are absolutely worth it for this hobby in my experience.
External Mix Airbrush: As you might have guessed, this is a model that has two openings that allow for paint and air to mix external to the airbrush. It’s a cheaper design and fine for some applications, but for fine work it’s not ideal.
Paint Feed Styles: Side, Siphon and Gravity
Gravity Feed Airbrush: Gravity feed is simply a cup on top of the airbrush. The paint is poured into the cup and gravity allows it to flow into the airbrush. The flow is regulated by the trigger.
Another huge advantage to the gravity feed airbrush when painting miniatures is the ability to mix your paint in the cup. Adding a couple of drops of paint or medium into the cup, and mixing it with a paint brush is very easy.
Side Feed Airbrush: Similar to gravity but in this case the cup is simply on the side of the airbrush. This is more rare and I’ve never seen one used personally.
Siphon Feed Airbrush: This is a container that sits underneath the airbrush with a tube that acts as a straw to suck the paint up into the airbrush. These are typically for larger projects and not ideal for miniature painting or modeling hobbyists.
Finally some airbrushes have a Micro Air Control (MAC) valve on it that can regulate the air pressure directly from the airbrush itself. It can be useful for painting miniatures as it allows easy control over the air pressure.
Needle and Nozzle Sizes: Which is Best for Miniatures and Models?
The Nozzle is the opening at the front of the airbrush that the paint spray comes out of. The Needle will go back and forth to allow air and paint through or stop it.
Nozzle sizes can vary from .15mm or lower to .5mm and higher. Most will fall within the .15 – .5 range. A smaller nozzle will produce a finer, thinner spray. Larger nozzles allow more paint through.
For miniature painting you want between .3 and .5 for the vast majority of your painting.
Smaller Nozzles: Allow for finer details. Allow for more control. They also clog much easier due to the small size of the opening. It will also take longer to fully spray larger models with a .15 mm as compared to a .5.
Larger Nozzles: While ultimately it’s nice to have both a large and small, if I had to choose just one I’d pick a larger size. They are much more beginner friendly for one, and much easier to keep from clogging.
The Badger Patriot 105 that I use all the time has a .5 nozzle. It’s perfect for beginners, and does the everyday work of priming, base coating and varnishing much more efficiently than a small size.
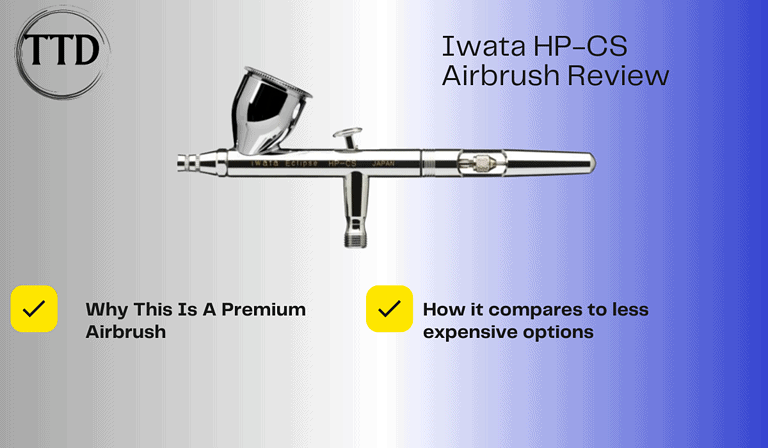
My Iwata HP-CS has a .35mm nozzle and while it can also do everything the Badger can, it’s a bit better for fine detail work.
My Infinity CR+ has a .15mm nozzle and I only break that out to do really fine details or light, small highlights.
Basic Techniques and Tips for Airbrushing Miniatures and Models
Thinning Your Paint for Airbrushing: Virtually any paint can be used through an airbrush. The big consideration in airbrush painting is how thin the paint is. You want to avoid clogs and get a smooth finish.
Start with adding a few drops of paint to the cup or an external container. Next add some flow improver or airbrush thinner medium. Mix with an old synthetic paint brush.
You’re looking to ensure the paint is thin, but not watery. You also want to make sure there are no paint clumps that will absolutely clog your airbrush.
The exact ratio of thinner to paint will vary on brand and paint type. There are also paint specifically made for airbrush painting. I would again rely on practice first to see how they flow through your specific airbrush.
Backflowing: Backflowing is when you cap or stop the airflow from coming out of the nozzle, and press down on the trigger and pull back. The air will flow back into the cup causing it to bubble if there is paint or water in it.
This is often used for two things when painting miniatures: mixing the paint or cleaning the airbrush.
Dual Action Airbrushes: The techniques below are for dual action brushes. These brushes require you to push down on the trigger for air, and pull back for paint.
Pulsing Spray Technique: The trigger pattern is Down, Back Forward, Back Forward. Release. So you’re holding the trigger down for air, then rocking it back and forward to allow paint flow. Ideally you want air flowing before and after paint passes through.
This spray is similar to how you’d use a spray can, short bursts of pressing down and releasing. You want to pulse and pass the spray over or across the miniature. Spraying on layers of paint in smooth coats.
When I am painting miniatures this is the technique I use most.
Steady Spray Technique: The trigger pattern here is down and slowly back, then forward and release to complete the spray. Sometimes a steady spray is needed for larger jobs. It’s simply pressing down and pulling back to get paint flowing.
If you are painting miniatures you’ll use this for applying light filters or perhaps zenithal priming.
Be aware that too much paint consistently through the brush can clog it. As long as you have thinned paint with no clumps in it, you should be able to spray for a bit.
Airbrush Control: Brush control is an important skill to practice. You want to be able to get paint where you want it for finer detail work. For priming, varnishing and base coats, where the goal is to get the spray equally distributed this isn’t as important.
The two big things to know about control are practice and stability. Practice can be done on miniatures or a simple blank sheet of paper. I like using paper to practice aim and thin straight lines.
Stability can be improved by bracing two hands together holding the brush. You can even brace your elbows against your chest or sides to increase stability. I would just warn against being too tense when doing this. Find what is comfortable.
Airbrush Spray Distance: The distance from your target has a big impact on the final result. If you spray near the target you’ll get a more concentrated amount of paint. Further away gets a broader more diffuse application of paint.
To get a better sense of how this all works I highly recommend practice on painting miniatures and practice on paper. Simply vary your distance and see the results.
12 inches away is roughly what I’d do for things like Zenithal Priming.
4-5 inches away is what I’d do for a small highlight.
Practice with various distances and how much spray you let out.
Thin Lines: Thin clean lines are something I did practice early on but found I didn’t need them very often. Still, this is great practice for brush control. My suggestion here is the following:
Start air flow, gently pull the trigger back as you sweep your hand across in a straight line. Feel free to brace your palm against your other hand for stability.
I would practice this on a piece of paper. Sweep across for a straight line (I personally prefer left to right but whatever works for you).
How thin or thick the line is depends on two things: Nozzle size and distance from target. Smaller nozzle and closer distance make thinner lines. Bigger nozzle and further away make thicker. Play around with it and you’ll get some experience.
Glazing and Filters: Glazing is generally just a very thin layer of paint. A filter is basically the same thing, a thin layer, but it typically refers to an all over spray as opposed to individual parts. Still the terms can be used almost interchangeably.
Thin layers with an airbrush are applied by lightly spraying thin, translucent, almost transparent paint. You want to still see the color underneath the glaze or filter after you apply it. The spay will alter the color, but it’s subtle.
Common Issues: Spidering. Spidering is the term for a spray that pushes the paint too strongly and splatters it in a round shape that sort of looks like a spider web. If this is happening check 4 things: PSI of your compressor, Distance you spray from, how thin the paint is and how much paint you’re allowing through.
Very thin paint requires less pressure. If you are spraying it close to the miniature, say you wanted just a small dot as a highlight, I would practice light pulses of paint on a piece of paper. A quick pulse, of thin paint, with lower pressure, say 20psi, might give the result you’re looking for.
How to Clean your Airbrush
When you clean the airbrush you can do a few things. Ultimately your goal is to get the leftover paint out of the airbrush in between painting sessions.
Airbrush Quick Clean Method
A quick clean of your airbrush when you want to change colors would be as simple as:
- Dump the paint out of the paint cup into your bucket or trash
- Use a squeeze bottle of water to rinse the paint cup out
- Fill the paint cup with a bit of water and backflow the airbrush (cover the nozzle with a cap or paper towel, be careful of the needle!)
- Dump out the water from the paint cup and refill with Airbrush cleaner
- Spray the airbrush cleaner through the airbrush.
I would recommend a large cup or even a small bucket nearby to dump water into.
Have a squeeze bottle with a long straw at the top like this one. These are perfect to squirt into the paint cup and get most of the paint out.
Airbrush Deep Clean Method
For a more thorough cleaning I would recommend taking the airbrush apart. You can fully clean things like the needle, nozzle, and insides of the airbrush.
Tools I would suggest include:
Airbrush cleaning pot – Simple container to spray into. Great for flushing out your airbrush and passing some cleaner through.
Airbrush cleaning tools – Various small thin scrubbing tools you can use to deep clean the nozzle and air passages in the airbrush.
Sonic cleaner with isopropyl alcohol – This is great for a deep clean. Disassemble the airbrush, fill the cleaner with isopropyl alcohol or airbrush cleaner or even warm water and turn it on.
Baby Wipes – I use these for so many things when painting miniatures. Wipe off the needle, wipe the inside of the paint cup, plug the nozzle for backflowing. They’re so versatile.
DIY Spraybooth: Finally I wanted to cover spray booths. I bought one on Amazon and it’s well worth it since I use it a lot. If you’d prefer to DIY it there are a lot on Youtube like this one: